총 네개의 시리즈로 OCI API Gateway와 Function을 이용한 서버리스 웹 어플리케이션 샘플 구성 방법을 살펴보겠습니다.
이전 글:
MySQL 설치/설정
어플리케이션과 연결할 데이터베이스를 설치합니다.
yum 명령으로 MySQL을 설치합니다. root 계정으로 수행했습니다.
[opc@demo ~]$ sudo -s
[root@demo opc]# yum install mysql-community-server -y
...
Installed:
  mysql-community-server.x86_64 0:8.0.29-1.el7

Dependency Installed:
  mysql-community-client.x86_64 0:8.0.29-1.el7                                                       mysql-community-icu-data-files.x86_64 0:8.0.29-1.el7

Complete!
MySQL을 시작하고, 상태를 확인합니다.
[root@demo opc]# systemctl start mysqld
[root@demo opc]# systemctl status mysqld
● mysqld.service - MySQL Server
   Loaded: loaded (/usr/lib/systemd/system/mysqld.service; enabled; vendor preset: disabled)
   Active: active (running) since Fri 2022-05-20 09:15:38 GMT; 5s ago
     Docs: man:mysqld(8)
           <http://dev.mysql.com/doc/refman/en/using-systemd.html>
  Process: 26040 ExecStartPre=/usr/bin/mysqld_pre_systemd (code=exited, status=0/SUCCESS)
 Main PID: 26124 (mysqld)
   Status: "Server is operational"
    Tasks: 38
   Memory: 465.8M
   CGroup: /system.slice/mysqld.service
           └─26124 /usr/sbin/mysqld

May 20 09:15:33 demo systemd[1]: Starting MySQL Server...
May 20 09:15:38 demo systemd[1]: Started MySQL Server.
초기 설치 시 MySQL root 패스워드가 자동으로 설정되어 있습니다. mysqld.log에서 임시 패스워드를 찾아냅니다.
[root@demo opc]# cat /var/log/mysqld.log | grep 'temporary password'
2022-05-20T09:15:35.807545Z 6 [Note] [MY-010454] [Server] A temporary password is generated for root@localhost: 4wujsEvkTe+?
MySQL에 접속해서 아래와 같이 MySQK root 패스워드를 alter user 명령으로 변경합니다.
[root@demo opc]# mysql -u root -p
Enter password:
Welcome to the MySQL monitor.  Commands end with ; or \\g.
Your MySQL connection id is 8
Server version: 8.0.29
...
mysql> alter user 'root'@'localhost' identified by 'Welcome123!@';
Query OK, 0 rows affected (0.01 sec)
이후 어플리케이션에서 MySQL 접속을 위해 원격 접속도 아래와 같이 허용합니다.
mysql> create user 'root'@'%' identified by 'Welcome123!@';
Query OK, 0 rows affected (0.00 sec)

mysql> grant all privileges on *.* to 'root'@'%';
Query OK, 0 rows affected (0.01 sec)

mysql> flush privileges;
Query OK, 0 rows affected (0.00 sec)
원격 접속 허용 결과를 쿼리로 확인합니다.
mysql> select host,user,plugin,authentication_string from mysql.user;
+-----------+------------------+-----------------------+------------------------------------------------------------------------+
| host      | user             | plugin                | authentication_string                                                  |
+-----------+------------------+-----------------------+------------------------------------------------------------------------+
| %         | root             | caching_sha2_password | $A$005J]iowajk*TjC&U)EJuFRSJJbBqPZ5S.LKcBENpkqwubMVm8TVOCyxVikf4 |
| localhost | mysql.infoschema | caching_sha2_password | $A$005$THISISACOMBINATIONOFINVALIDSALTANDPASSWORDTHATMUSTNEVERBRBEUSED |
| localhost | mysql.session    | caching_sha2_password | $A$005$THISISACOMBINATIONOFINVALIDSALTANDPASSWORDTHATMUSTNEVERBRBEUSED |
| localhost | mysql.sys        | caching_sha2_password | $A$005$THISISACOMBINATIONOFINVALIDSALTANDPASSWORDTHATMUSTNEVERBRBEUSED |
| localhost | root             | caching_sha2_password | $A$005$Icmd"9L^WC4Z<?(|cU2bhA9NAl4DB02agQhyBRM8bsxLeBYmtAJp0y87BkC |
+-----------+------------------+-----------------------+------------------------------------------------------------------------+
5 rows in set (0.00 sec)
MySQL 샘플 데이터 설치
MySQL 샘플 데이터는 GitHub에서 다운로드 받을 수 있습니다. 아래 GitHub 주소로 이동합니다.
https://github.com/datacharmer/test_db

git clone 명령으로도 내려받을 수 있으나, 여기서는 아래와 같이 샘플 데이터 zip 파일을 내려받았습니다.
다운로드 받은 zip 파일 형태의 샘플 데이터 MySQL 서버에 업로드합니다.

업로드한 샘플 데이터파일의 압축을 해제하고, 해당 디렉토리로 이동합니다.
[root@demo opc]# unzip ./test_db-master.zip
...
inflating: test_db-master/test_versions.sh
[root@demo opc]# cd test_db-master/
employees.sql 파일을 열어서InnoDB, MyISAM, Falcon, PBXT, Maria 등의 스토리지 엔진을 아래와 같이 지정할 수도 있으나, 디폴트로 InnoDB 엔진이 활성화되어 있습니다. 따라서 별도로 스토리지 엔진을 지정하지 않았습니다.
set storage_engine = InnoDB;
-- set storage_engine = MyISAM;
-- set storage_engine = Falcon;
-- set storage_engine = PBXT;
-- set storage_engine = Maria;
MySQL 명령 툴로 MySQL 인스턴스에 데이터를 로드합니다.
[root@demo test_db-master]# mysql -t -uroot -p < employees.sql
Enter password:
+-----------------------------+
| INFO                        |
+-----------------------------+
| CREATING DATABASE STRUCTURE |
+-----------------------------+
+------------------------+
| INFO                   |
+------------------------+
| storage engine: InnoDB |
+------------------------+
+---------------------+
| INFO                |
+---------------------+
| LOADING departments |
+---------------------+
+-------------------+
| INFO              |
+-------------------+
| LOADING employees |
+-------------------+
+------------------+
| INFO             |
+------------------+
| LOADING dept_emp |
+------------------+
+----------------------+
| INFO                 |
+----------------------+
| LOADING dept_manager |
+----------------------+
+----------------+
| INFO           |
+----------------+
| LOADING titles |
+----------------+
+------------------+
| INFO             |
+------------------+
| LOADING salaries |
+------------------+
+---------------------+
| data_load_time_diff |
+---------------------+
| 00:00:33            |
+---------------------+
업로드한 데이터를 확인합니다.
[root@demo test_db-master]# mysql -t -uroot -p
Enter password:
Welcome to the MySQL monitor.  Commands end with ; or \\g.
Your MySQL connection id is 13
Server version: 8.0.29 MySQL Community Server - GPL

Copyright (c) 2000, 2022, Oracle and/or its affiliates.

Oracle is a registered trademark of Oracle Corporation and/or its
affiliates. Other names may be trademarks of their respective
owners.

Type 'help;' or '\\h' for help. Type '\\c' to clear the current input statement.

mysql> show databases;
+--------------------+
| Database           |
+--------------------+
| employees          |
| information_schema |
| mysql              |
| performance_schema |
| sys                |
+--------------------+
5 rows in set (0.00 sec)

mysql> use employees;
Reading table information for completion of table and column names
You can turn off this feature to get a quicker startup with -A

Database changed
mysql> show tables;
+----------------------+
| Tables_in_employees  |
+----------------------+
| current_dept_emp     |
| departments          |
| dept_emp             |
| dept_emp_latest_date |
| dept_manager         |
| employees            |
| salaries             |
| titles               |
+----------------------+
8 rows in set (0.00 sec)

mysql> select count(*) from employees;
+----------+
| count(*) |
+----------+
|   300024 |
+----------+
1 row in set (0.01 sec)

mysql> exit
Bye
[root@demo test_db-master]# exit
exit
Python에서 MySQL 연결 코드 작성
Python 코드에서 MySQL 데이터베이스 연결을 위해 pymysql 모듈을 이용합니다. 이를 위해 pymysql 모듈을 설치합니다.
[opc@demo ~]$ sudo pip3.6 install PyMySQL
WARNING: Running pip install with root privileges is generally not a good idea. Try `pip3.6 install --user` instead.
Collecting PyMySQL
  Downloading <https://files.pythonhosted.org/packages/4f/52/a115fe175028b058df353c5a3d5290b71514a83f67078a6482cff24d6137/PyMySQL-1.0.2-py3-none-any.whl> (43kB)
    100% |████████████████████████████████| 51kB 9.8MB/s
Installing collected packages: PyMySQL
Successfully installed PyMySQL-1.0.2
MySQL에 연결하여 부서 정보를 가져오는 Python 코드 샘플입니다. 데이터베이스 호스트에는 컴퓨트 인스턴스의 FQDN(Fully Qualified Domain Name)을 사용했습니다. 데이터베이스 연결과 데이터를 가져오는 부분에서 로그를 찍도록 했습니다.
Python 코드를 저장합니다. 여기에서는 dbconn.py 라는 이름으로 파일을 저장했습니다.
import logging
import pymysql

dbhost = 'demo.sub05160457070.demovcn.oraclevcn.com'
dbuser = 'root'
dbpassword = 'Welcome123!@'
dbname = 'employees'

logger = logging.getLogger()
logger.setLevel(logging.INFO)

conn = pymysql.connect(host=dbhost, user=dbuser, password=dbpassword, db=dbname, connect_timeout=5)

def list_data():
    try:
        cursor = conn.cursor()
        sql = "select * from departments limit 5"
        cursor.execute(sql)
    except Exception as ex:
        logger.error("ERROR: Could not fetch data.")
        logger.error(e)

    logger.info("SUCCESS: Fetching data succeeded")

    rows = cursor.fetchall()

    for row in rows:
        print("{0} {1}".format(row[0], row[1]))

result = list_data()
코드가 정상 작동하는지 확인합니다.
[opc@demo ~]$ ls dbconn.py
dbconn.py
[opc@demo ~]$ python dbconn.py
d009 Customer Service
d005 Development
d002 Finance
d003 Human Resources
d001 Marketing
OCI Function 코드로 전환
앞서 작성한 Python 코드를 OCI Function에서도 수행될 수 있도록 코드 변환이 필요합니다. 이때 handler라고 하는 함수를 지정해야 합니다. OCI Function은 코드를 실행할 때 마다 이 handler 함수를 호출하게 됩니다. 즉 handler 함수는 코드의 시작점으로서 OCI Function이 실행될 때마다 수행됩니다. handler 함수는 Function의 컨텍스트와 데이터를 입력값으로 해서 Python 함수 호출 결과를 반환합니다.
아래와 같이 fn init 명령으로 demo-hr Function을 생성하고 해당 디렉토리로 이동합니다.
[opc@demo ~]$ fn init --runtime python demo-hr
Creating function at: ./demo-hr
Function boilerplate generated.
func.yaml created.
[opc@demo ~]$ cd demo-hr/
[opc@demo demo-hr]$ ls
func.py  func.yaml  requirements.txt
먼저 func.py 파일을 handler 함수를 이용하도록 앞서 작성했던 Python 코드를 아래와 같이 변경합니다. 기존 func.py 파일의 내용은 삭제하고 아래 내용으로 교체합니다.
import io
import json
import logging
import pymysql
from fdk import response

logger = logging.getLogger()
logger.setLevel(logging.INFO)

dbhost = 'demo.sub05160457070.demovcn.oraclevcn.com'
dbuser = 'root'
dbpassword = 'Welcome123!@'
dbname = 'employees'

conn = pymysql.connect(host=dbhost, user=dbuser, password=dbpassword, db=dbname)

def list_data():
    try:
        cursor = conn.cursor()
        sql = "select * from departments"
        cursor.execute(sql)
    except Exception as ex:
        logger.error("ERROR: Could not fetch data.")
        logger.error(e)

    logger.info("SUCCESS: Fetching data succeeded")

    rows = cursor.fetchall()

    return  rows

def handler(ctx, data: io.BytesIO=None):

    try:
        conn
    except pymysql.MySQLError as ex:
        logger.error("ERROR: Unexpected error: Could not connect to MySQL instance.")
        logger.error(e)
        sys.exit()

    logger.info("SUCCESS: Connection to MySQL instance succeeded")

    result = list_data()
    return response.Response(
        ctx,
        response_data=json.dumps(result),
        headers={"Content-Type": "application/json"}
    )
그리고 위 코드를 실행하기 위해 필요한 pymysql, cryptography 모듈을 requirements.txt 파일에 아래와 같이 추가합니다.
[opc@demo demo-hr]$ cat requirements.txt
fdk>=0.1.45
pymysql
cryptography
이제 demo-app 어플리케이션에 Function을 배포합니다.
[opc@demo demo-hr]$ fn -v deploy --app demo-app
...
Successfully built c26417569b48
Successfully tagged iad.ocir.io/apackrsct01/demo-repo/demo-hr:0.0.2
배포한 Function을 호출해서 정상 수행되는지 확인합니다.
[opc@demo demo-hr]$ fn invoke demo-app demo-hr
[["d009", "Customer Service"], ["d005", "Development"], ["d002", "Finance"], ["d003", "Human Resources"], ["d001", "Marketing"], ["d004", "Production"], ["d006", "Quality Management"], ["d008", "Research"], ["d007", "Sales"]]
지금까지 부서 정보를 가져오는 “demo-hr” 이라는 Function을 “demo-app”이라는 어플리케이션에 생성/배포/호출까지 해 봤습니다. 이후 API Gateway 동작을 확인하기 위해 “demo-hr”과 거의 동일한 “demo-fi”라는 Funtion을 하나 더 만들겠습니다. 차이점은 급여 정보를 가져오는 것 뿐입니다.
아래 코드를 이용해서, requirements.txt 파일 수정을 포함한 위에서 수행했던 과정을 그대로 수행합니다. Funtion 이름은 “demo-fi”입니다.
import io
import json
import logging
import pymysql
from fdk import response

logger = logging.getLogger()
logger.setLevel(logging.INFO)

dbhost = 'demo.sub05160457070.demovcn.oraclevcn.com'
dbuser = 'root'
dbpassword = 'Welcome123!@'
dbname = 'employees'

conn = pymysql.connect(host=dbhost, user=dbuser, password=dbpassword, db=dbname)

def list_data():
    try:
        cursor = conn.cursor()
        sql = "select emp_no, salary from salaries limit 10"
        cursor.execute(sql)
    except Exception as ex:
        logger.error("ERROR: Could not fetch data.")
        logger.error(e)

    logger.info("SUCCESS: Fetching data succeeded")

    rows = cursor.fetchall()

    return  rows

def handler(ctx, data: io.BytesIO=None):

    try:
        conn
    except pymysql.MySQLError as ex:
        logger.error("ERROR: Unexpected error: Could not connect to MySQL instance.")
        logger.error(e)
        sys.exit()

    logger.info("SUCCESS: Connection to MySQL instance succeeded")

    result = list_data()
    return response.Response(
        ctx,
        response_data=json.dumps(result),
        headers={"Content-Type": "application/json"}
    )
“demo-fi” Function을 호출하여 결과를 확인합니다.
[opc@demo demo-fi]$ fn invoke demo-app demo-fi
[[10001, 60117], [10001, 62102], [10001, 66074], [10001, 66596], [10001, 66961], [10001, 71046], [10001, 74333], [10001, 75286], [10001, 75994], [10001, 76884]]
“demo-fi” Function까지 배포하고 나면 아래와 같은 정보를 확인할 수 있습니다.
[opc@demo demo-fi]$ docker images | grep demo
iad.ocir.io/apackrsct01/demo-repo/demo-fi        0.0.2               fccd8a81f473        About a minute ago   192MB
iad.ocir.io/apackrsct01/demo-repo/demo-hr        0.0.2               c26417569b48        33 minutes ago       192MB
iad.ocir.io/apackrsct01/demo-repo/hello-python   0.0.2               516cb0ff9174        7 hours ago          176MB
[opc@demo demo-fi]$ fn list apps
NAME            ID
demo-app        ocid1.fnapp.oc1.iad.aaaaaaaab6xmjao7kxktoj65itpx4f7vfnrp2m24gtznmelbczrqe6tm2uvq
[opc@demo demo-fi]$ fn list functions demo-app
NAME            IMAGE                                                   ID
demo-fi         iad.ocir.io/apackrsct01/demo-repo/demo-fi:0.0.2         ocid1.fnfunc.oc1.iad.aaaaaaaahhngzydlx3gkyskbj6uls2aucjaenvijbtczooizlytq6p5ut3xq
demo-hr         iad.ocir.io/apackrsct01/demo-repo/demo-hr:0.0.4         ocid1.fnfunc.oc1.iad.aaaaaaaa5oa3n7segwsidgl36gcnfpkanzghkmhyeowvtlo7ywl3fstc7e4q
hello-python    iad.ocir.io/apackrsct01/demo-repo/hello-python:0.0.2    ocid1.fnfunc.oc1.iad.aaaaaaaahptbwj5xek6w2zsf3tt4qcffmvoiaa6os3mi2gr56wyke75ndohq
OCI Function logging 설정 및 모니터링
OCI Function의 디버그나 수행 내용 확인을 위해서는 Developer Services > Functions > Applications 화면으로 이동한 후, OCI Function의 디버깅을 하거나 수행 내용을 확인하기 위해서는 OCI Function Logs를 켜고 Function 코드에 print/log 구문을 넣어서 이를 수행 합니다. 이러한 OCI Function Logs를 Enable하는데는 세가지 옵션이 있습니다.
- Fn Project CLI 명령으로 syslog URL을 지정하는 방법
- 오브젝트 스토리지 버킷에 로그를 보내는 방법
- OCI 웹 콘솔을 통해 OCI Logging에서 Function Logs를 Enable하고 조회하는 방법
이 중에서 세번째 OCI 웹 콘솔을 이용해서 Function Logs를 켜고 조회해 보겠습니다. OCI Logging 서비스는 Function 로그에 접근하고, 검색하고, 저장하기 위한 기본값이자 오라클 권고사항으로, 이를 활성화하면 어플리케이션의 Funtion이 호출될 때마다 로그가 생성됩니다.
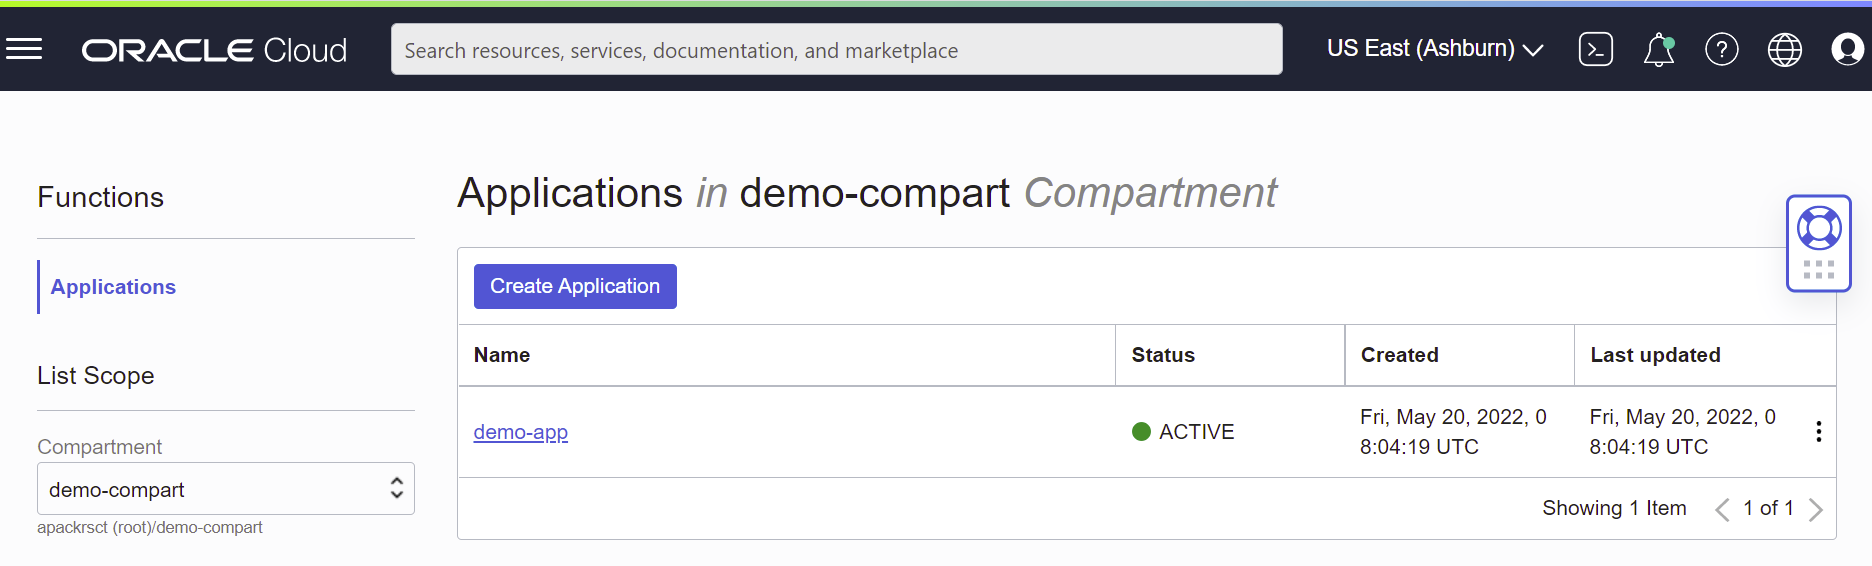
OCI 웹 콘솔에서 Developer Services > Functions > Applications 화면으로 이동하여 로그를 생성, Enable, 조회할 어플리케이션을 선택합니다.
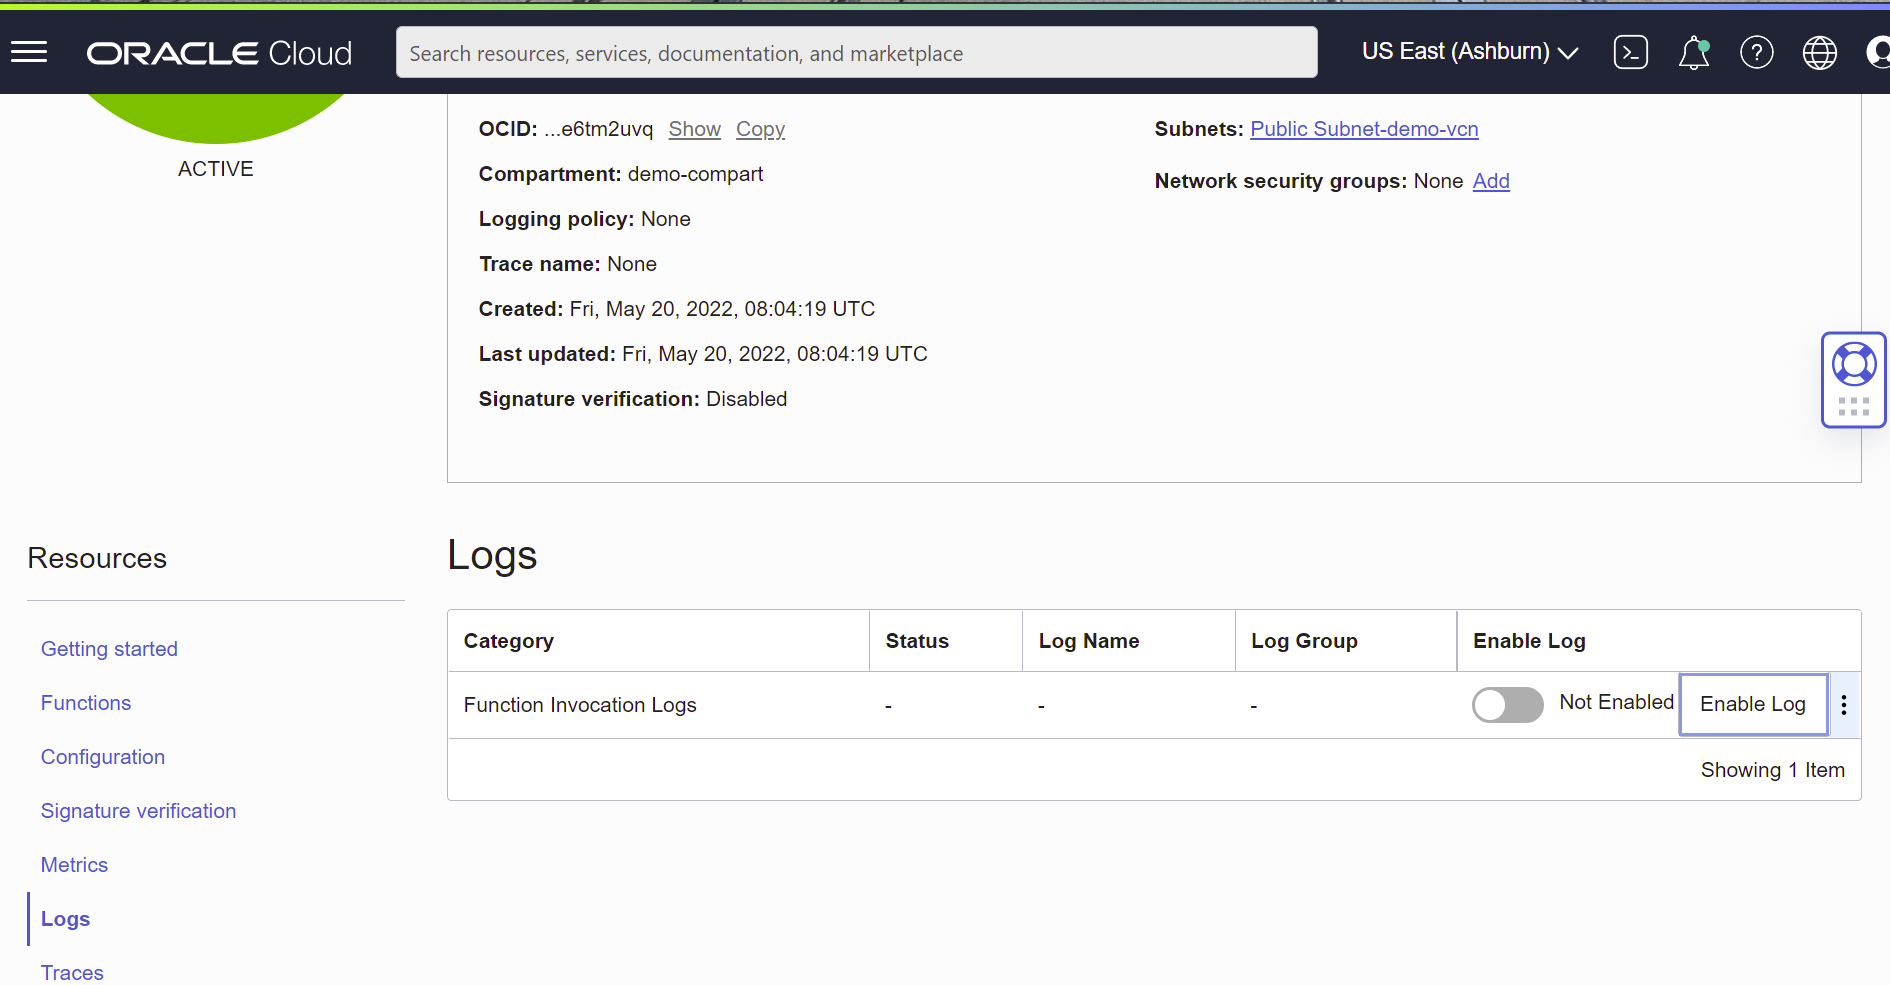
그리고 왼쪽 하단의 Resources 아래 Logs를 클릭해서 나오는 Logs 섹션에서 로그의 오른쪽 Actions 아이콘을 클릭한 다음, Enable Log를 클릭합니다.
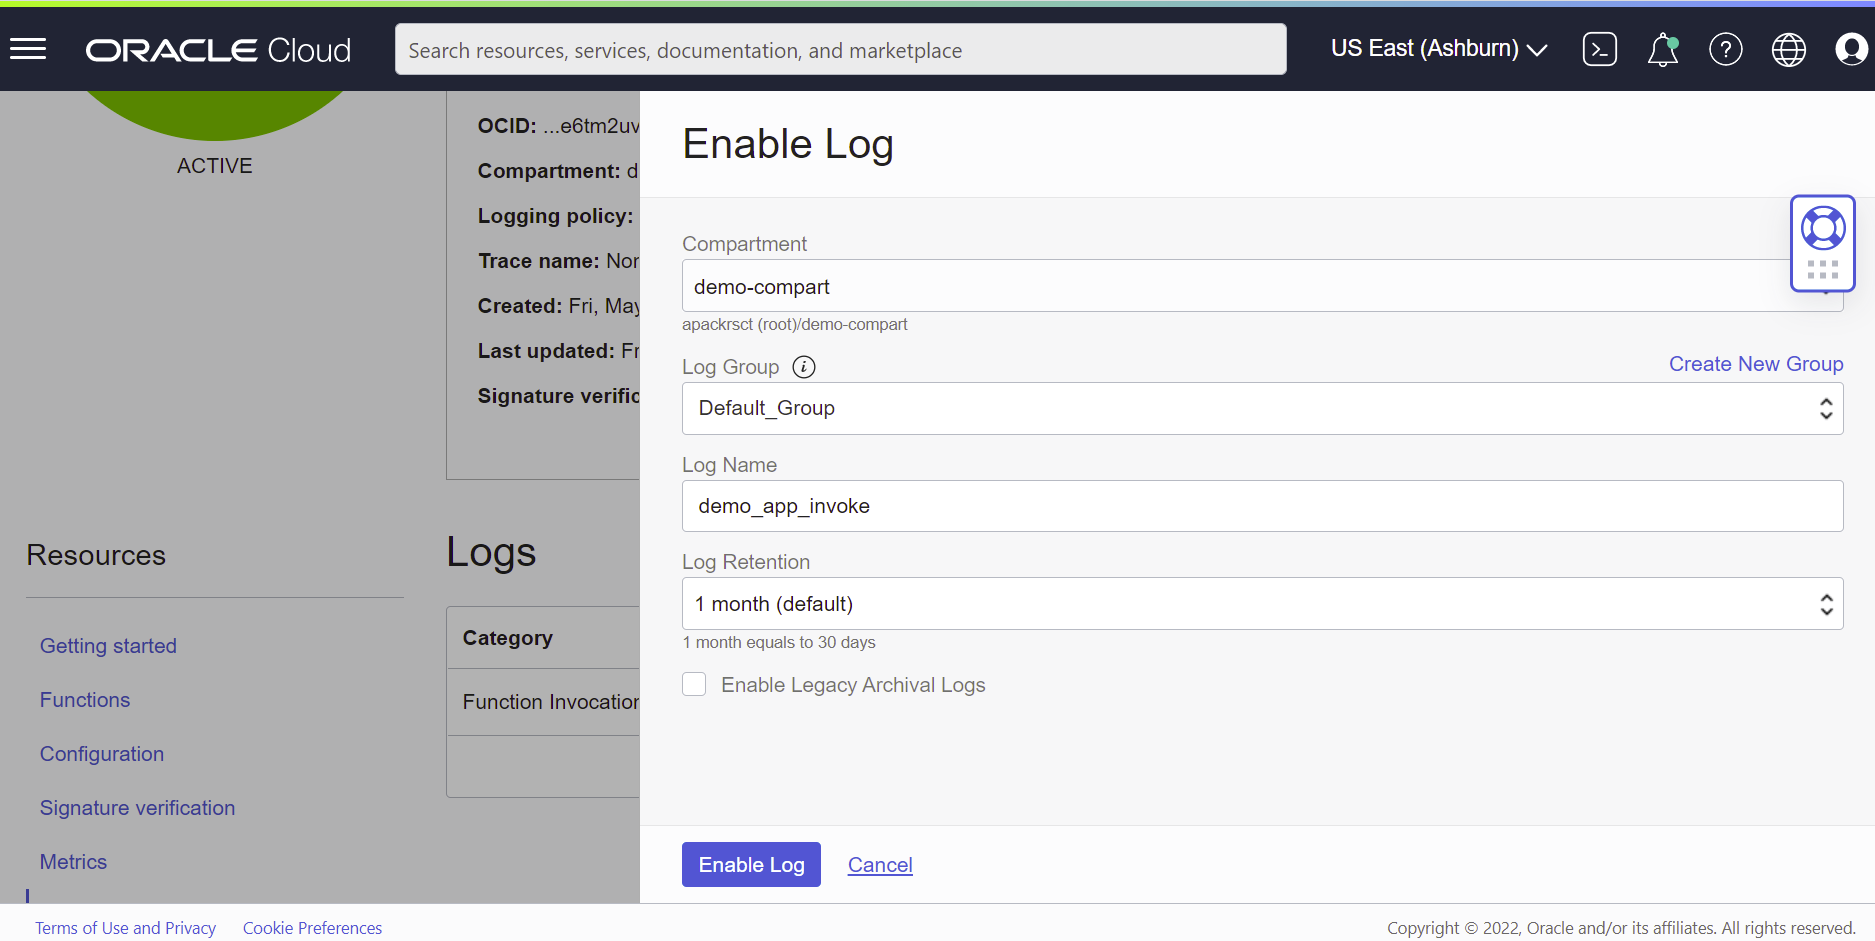
컴파트먼트, 로그 그룹, 로그 이름, 로그 보관주기 등을 입력/설정하고 Enable Log를 클릭하여 로그를 생성합니다. 여기에서는 모두 기본값을 사용했습니다.
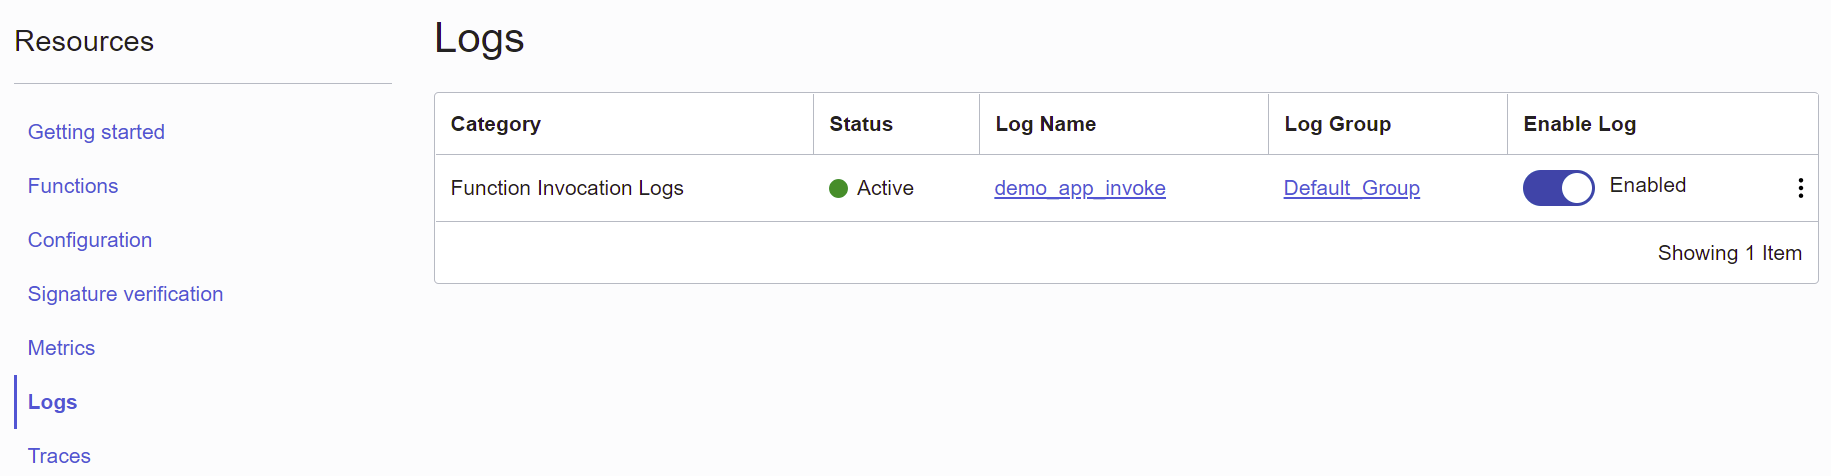
이제 로그가 활성화되었습니다.
로그가 활성화된 상태에서 demo-hr, demo-fi, hello-python을 실행 한 후, 잠시 후 로그를 확인해 보겠습니다. 로그 이름을 클릭하면 Observability & Management > Logging > Logs 화면으로 이동하게 되며, 여기에서 Function이 호출될 때마다 로그가 생성된 것을 알 수 있습니다.
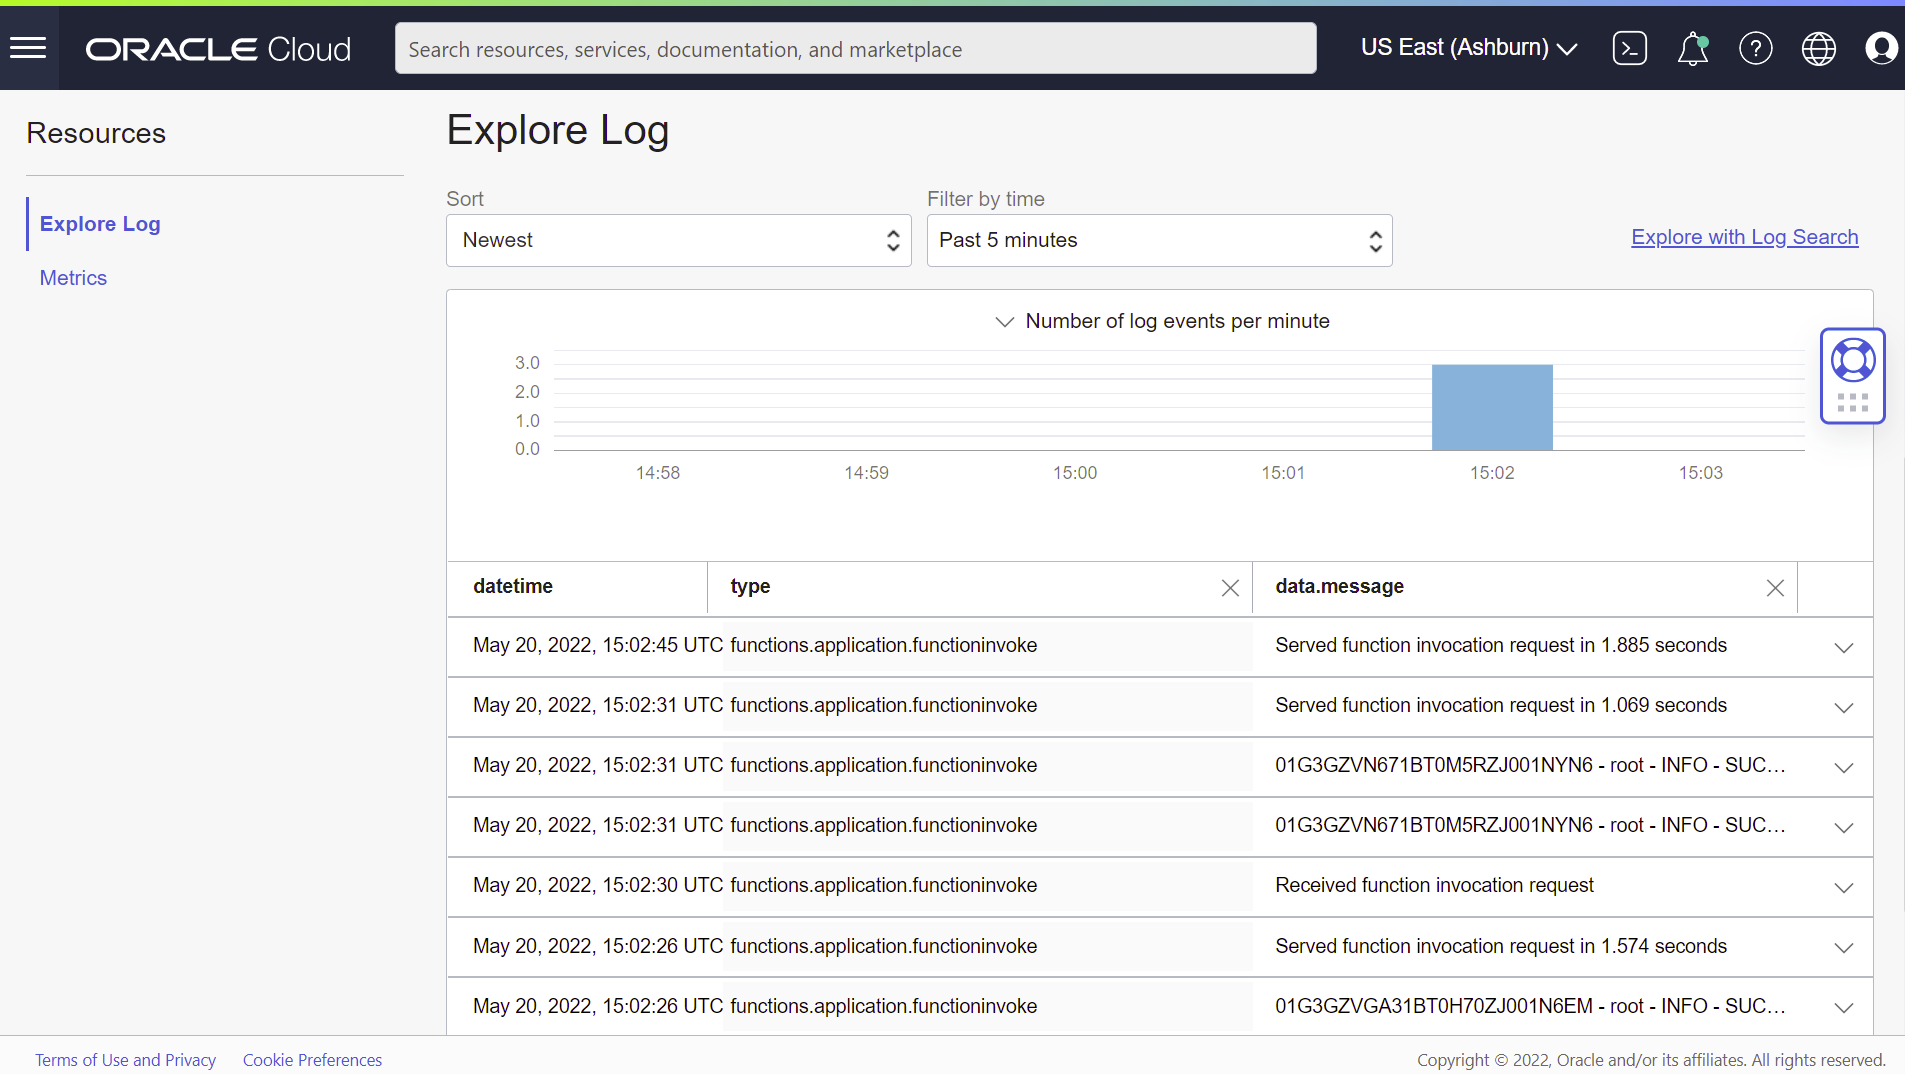
각각의 로그를 클릭해 보면 보다 상세한 정보를 확인할 수 있습니다. Python 코드에서 log를 찍었던 내용의 실행 결과물을 웹 콘솔에서 상세하게 확인할 수 있습니다.

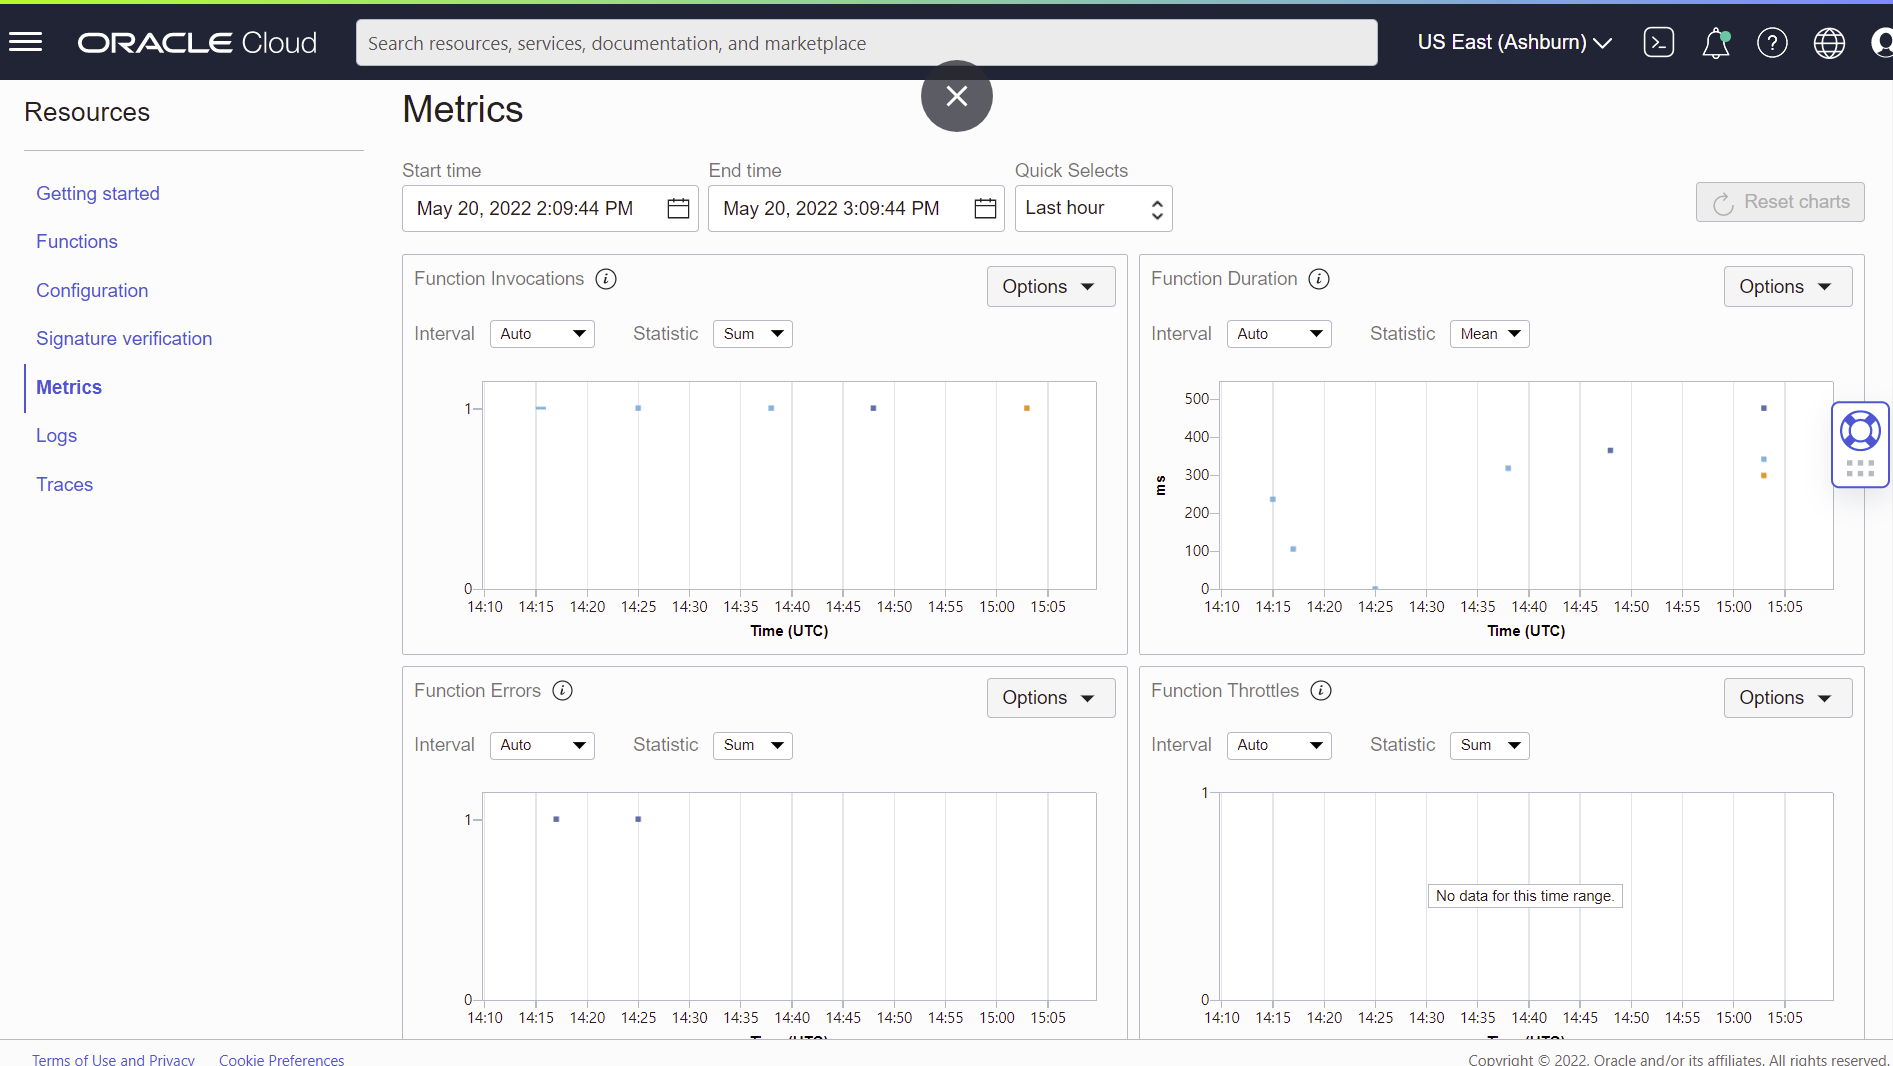
어플리케이션 화면의 Resources 아래 Metrics에서는 Function의 호출 횟수, 지속시간, 에러, “429 Too Many Requests”에러를 리턴한 요청 수 등을 모니터링 할 수 있습니다.
다음 글:
<END>
'Cloud > Oracle Cloud Infrastructure (OCI)' 카테고리의 다른 글
| OCI Kubernetes와 MySQL 서비스를 활용한 어플리케이션 배포 데모 - #1. OKE 클러스터 설치 (0) | 2022.05.27 |
|---|---|
| OCI API Gateway와 Function을 이용한 서버리스 웹 어플리케이션 샘플 - #4 API Gateway 생성/배포/테스트 (0) | 2022.05.23 |
| OCI API Gateway와 Function을 이용한 서버리스 웹 어플리케이션 샘플 - #2 OCI Function 개발 환경 구성 (0) | 2022.05.23 |
| OCI API Gateway와 Function을 이용한 서버리스 웹 어플리케이션 샘플 - #1 Overview & 사전준비 (0) | 2022.05.23 |
| OCI Python Function 디버그하는 방법 (0) | 2022.05.13 |


